How to Choose the Best Image File Format for Your Website
Quick Links
Choosing the best image file format for your website is a must. The right image file type makes your site look sharp, load fast, and provide a good user experience. The wrong one can leave you with over-pixelated photos, blurry graphics, and slow performance.
In this guide, we cover the most common image file formats for websites—JPEG (or JPG), PNG, WebP, SVG, and GIF—when to use each type and how to optimize images for a Squarespace website.
Key takeaway: Photos are best as WebP or JPEG (or JPG). Logos and graphics are best as PNG or SVG. Animated elements are best as GIFs.
Why Image Content Matters For Websites
Only 3.3% of websites don’t use any image file formats. Humans love consuming visual content as our brains process images faster than text.
Both the content of the image and the technical aspect of the image file are important to get right. Site images convey messages, emotions, and aesthetics—photos work to educate, influence, inspire, and encourage people to take action.
About Image File Formats
Like logo file formats, all digital images online are saved in a file type. File types provide a standardized way to store, share and display images. They are defined by how the image data is compressed and interpreted.
Different image file formats meet specific needs and support various features. Each image format has a purpose and comes with its own set of pros and cons—the image file format you choose should be selected based on your specific usage.
Image File Formats Impact
Appearance: Formats handle detail differently.
Performance: Formats can improve or lower page speed; Smaller file sizes load faster.
Scalability: Some formats can resize without losing quality.
The goal for your website is to optimize and upload the correct image file format that looks good, loads fast, and responds nicely across all devices.
When you get your image content and file type right, you provide a positive user experience for your website visitors.
Vector vs. Raster Images
Image file formats are either vector or raster.

Vector images are made of lines, points and polygons. They can be scaled infinitely without losing quality—perfect for logos, icons, and simple illustrations.
Common Vector File Types
AI
SVG
EPS
PDF
Raster images are made of pixels. They will lose quality when scaled. They’re best for detailed visuals like photos and are the most commonly uploaded to websites. Raster images must be exported with the correct pixel dimensions and file size for the end usage to reduce perceptible quality loss.
Common Raster File Types
JPEG (or JPG)
PNG
WebP
GIFF
TIFF
PSD
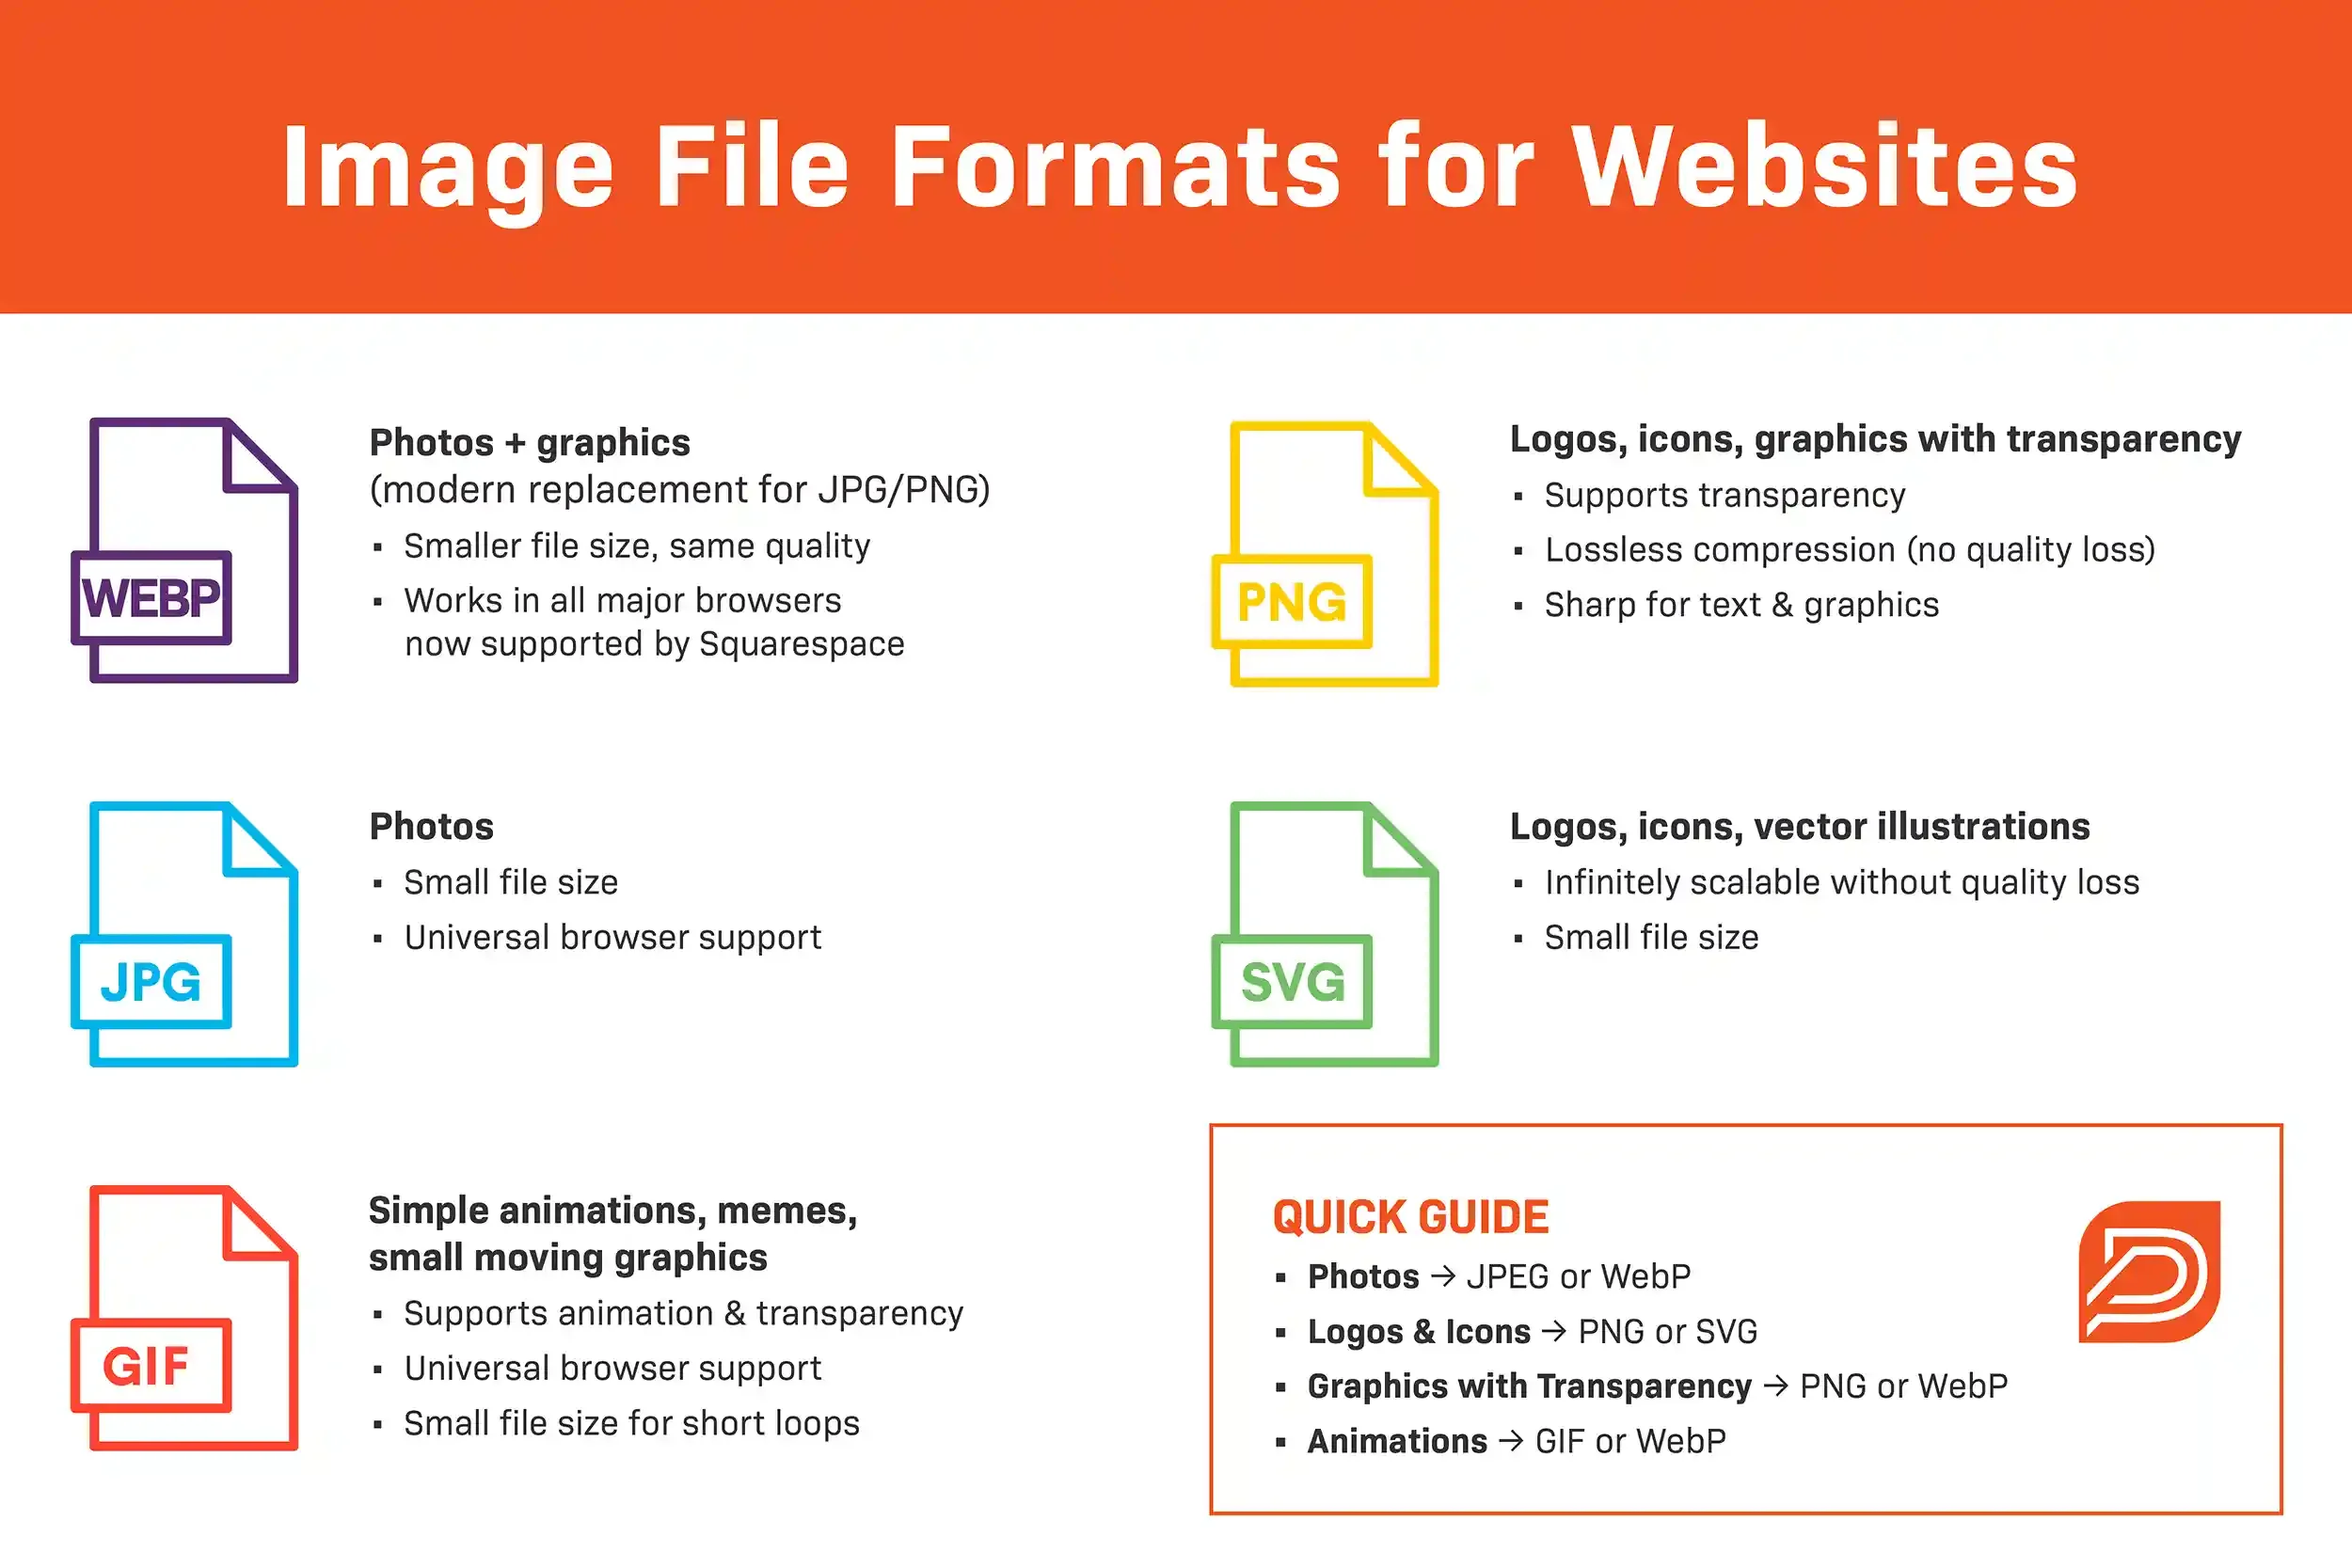
Image File Formats For Websites: WebP, JPEG, PNG, SVG and GIF
Here’s a breakdown of the most commonly used formats for the web, supported by most web browsers.
WebP
WebP is an image format developed by Google in 2010 to make the web faster. WebP compresses lossy images like JPEG to reduce file size, increase web page performance, and perceptibly preserve image quality.
Most major modern web browsers natively support WebP: Google Chrome, Microsoft Edge, Firefox, Safari, and Opera. Not all CMS platforms accept WebP, but Squarespace finally launched WebP support in 2025!
WebP achieves even better file size reduction than JPEG (when optimized), which means less data consumption, faster websites, and better web user experience, especially on slow networks.
Best for: Photos
Pros: Combines the best of JPG and PNG—smaller file size and supports transparency
Cons: Not supported by old web browsers (5% worldwide) and some CMS platforms
If your platform supports it, WebP is often the best image file type for website photos because it keeps quality high while reducing file size.
JPEG (or JPG)
JPEG is the standard file format of digital cameras. It’s a raster-based image designed for web and print usage and is the second most commonly used image file format on websites.
JPEGs can be optimized for web use to make them load faster, but the compression is not as significant as WebP without compromising visual quality.
Best for: Photos
Pros: Small file size (depending on compression), universal browser support, millions of colors
Cons: No transparency, quality loss with repeated saving
PNG
PNG files are the most commonly used file format on websites. They support transparent backgrounds and retain overall higher quality images and smaller file size than JPEGs and WebP for graphics (not photographs).
For graphics like logos, icons, and simple illustrations that have few colors and require a transparent background, PNG is the go-to file type for websites. While WebP would generally provide a smaller file size, PNG (saved for web: PNG-24) will appear as a sharper image (for graphics).
Best for: Graphics, logos, icons, images with transparency
Pros: Supports transparency, lossless compression, and sharp graphics
Cons: Not suited for photos and can be a larger file size than other formats (depending on compression)
SVG
SVG is a vector image format for graphics developed by the World Wide Web Consortium (W3C) in 1998.
SVG supports transparency and doesn’t use pixels, which allows the image to scale and maintain quality. Modern web browsers support SVGs.
An SVG file is the ideal format for graphics because it provides the sharpest quality and a small file size compared to PNG, WebP and JPEG.
If your CMS platform doesn't support SVG file uploads, a PNG file is the next best format for graphic use.
Best for: Logos, icons and simple illustrations
Pros: Infinitely scalable, crisp, small file size
Cons: Not suited for photos and not supported by some CMS platforms (Squarespace does not natively support SVG upload, but they can be used with custom code workarounds)
GIF
GIF is a lossless raster format that’s best used for animated graphics where few colors are needed.
GIF is the only animated image format supported in all major web browsers. GIFs support transparency and can be highly compressed to reduce file size.
Other alternative animated image file formats include: APNG (Animated Portable Network Graphics), WebP, MNG (Multiple-image Network Graphics) and FLIF (Free Lossless Image Format), but these are not widely supported.
Image editing programs like Adobe Photoshop, GIMP, Microsoft GIF Animator, and Giphy can be used to create GIFs.
Best for: Animations and simple graphics
Pros: Universal browser support, animation, transparency
Cons: Limited to 256 colors, not suited for photos, and copyright issues
Quick Guide
What image file format do you use on your website?
To choose the best image file format for your website, you must understand the different file types and their intended use.
Photos: WebP or JPEG
Logos & Icons: PNG or SVG
Graphics with Transparency: PNG or WebP
Animation: GIF or WebP

How to Optimize Images on Your Website
Even if you choose the best image file format, unoptimized raw images can still slow down your website’s page speed. Always keep a high-quality original. Upload only the optimized version for your site.
After selecting the best image file format, you need to optimize the image before uploading. Optimizing an image involves resizing, compressing, exporting, and renaming. Follow these steps:
1. Resize to the Correct Dimensions
You don’t need to upload a 6000px wide photo if it only needs to display at 1500px. Check the native image dimensions and resize them to match the display size on your site.
For example, full-screen background images would need to be larger to display on a desktop without looking pixelized, while a small blog author profile photo could be sized much smaller and still look good.
According to Squarespace’s image guide, they create 7 variations of each uploaded image for optimal display based on screen size. They recommend an image width of 2500px and a file size of 500 KB or less.
2. Compress and Export the File
After resizing, use a tool like Photoshop, Squoosh, or TinyPNG to save the file for the web. Aim for the smallest file size without noticeable quality loss. Save for web features typically export the file in RGB and remove unnecessary metadata (location, camera settings, etc).
3. Rename the File
Instead of “IMG_2039.webp”, use descriptive keywords that describe the photo, such as “best-image-file-format-example.webp”. Use hyphens to separate words.
This keeps your image files organized and searchable inside your website’s media library and can also boost your site traffic via image searches in search engines.
4. Upload File and Add Alt Text
Upload the image to your site and add alt text (alternative text). Alt text is text you add to images to make them more accessible. Search engines also use alt text to identify the content in the image. If you don’t add alt text, your image file name serves as the alt text.
Your alt text should be descriptive, helpful, short, written in a real sentence (no hyphens), include a keyword, and omit words like “the”, “a” and “photo”.
Image Optimization Overview
Optimizing photos for your site will likely take some experimentation and testing. The goal is to achieve the best image quality with a smaller pixel dimension and file size, which will depend on the intended display of the image.
You want your images to look good and improve your site's load time. Keep in mind that the more images you have on a page, the more they contribute to the overall page weight.
Once you get your image optimization process down, your website’s speed should improve. The result? A superlight website that loads fast on any device and network, and looks terrific at the same time. Yay!
Other Image Considerations
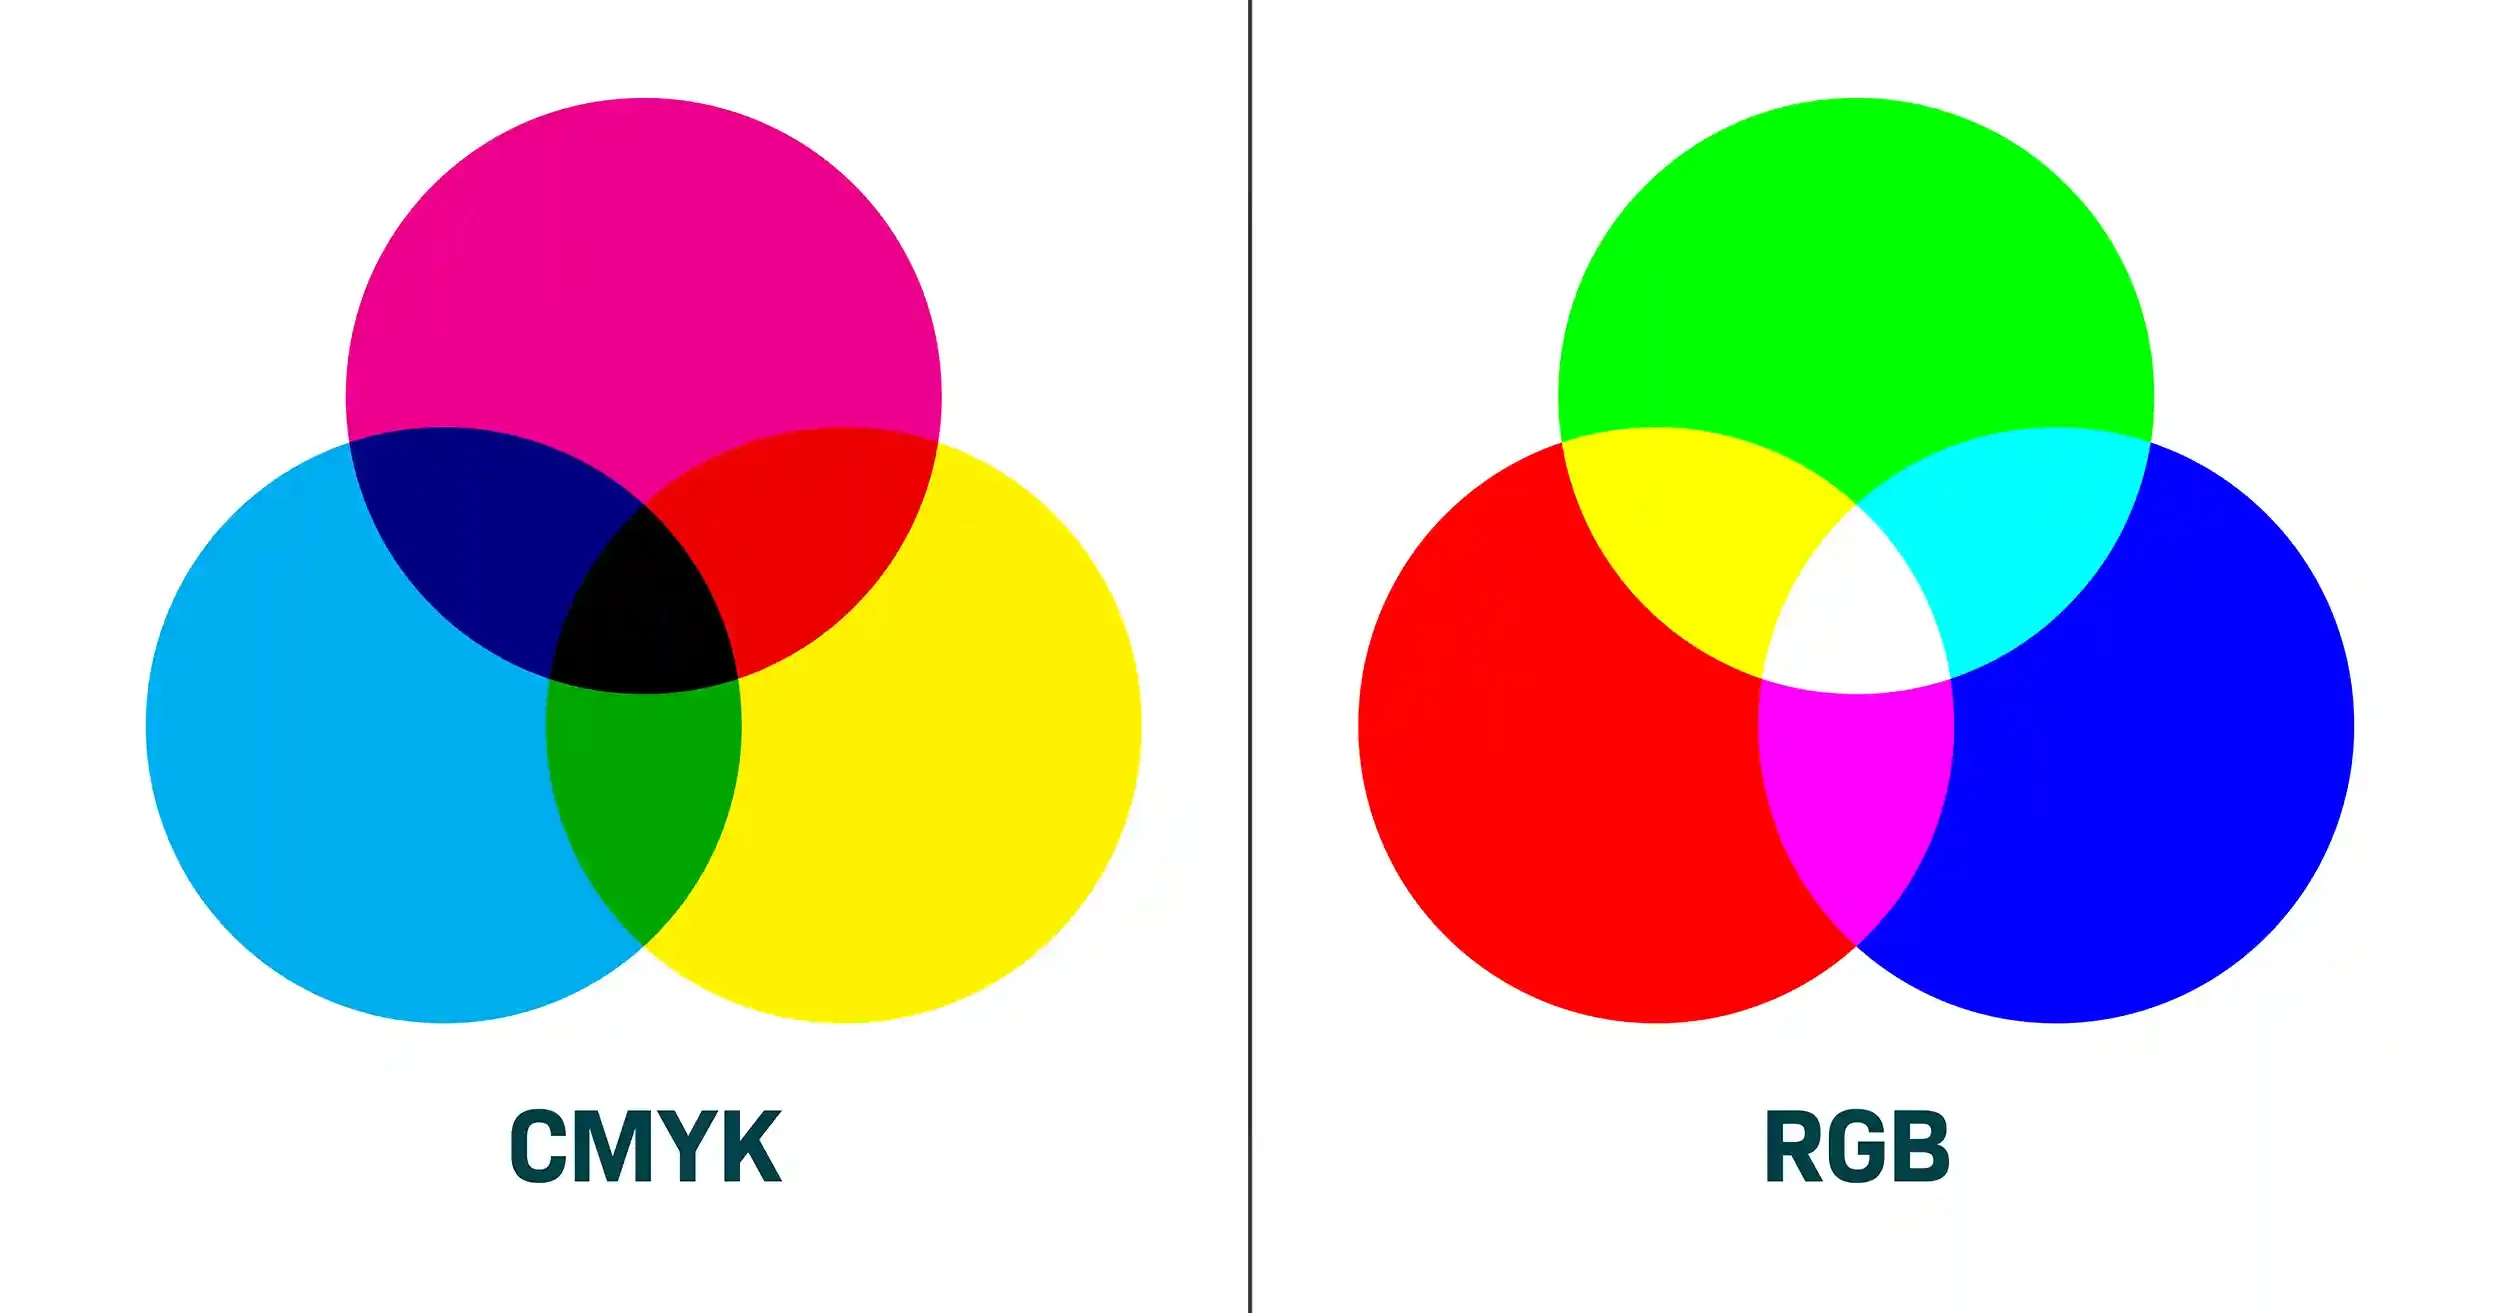
Image Color Mode: RGB vs. CMYK
RGB (Red, Green and Blue) is the color space used for screen-based display. RGB uses light to create colors, which is how monitors work.
CMYK (Cyan, Magenta, Yellow and Key/Black) is used for commercial printing to create full-color images by combining the 4 ink colors.
Image Color Modes
RGB: for web
CMYK: for print
Use the RGB color mode when editing images for your website to ensure accurate and consistent display of color across devices. You can convert image files from RGB to CMYK and vice versa using software like Adobe Photoshop.
Image Resolution and Pixel Dimensions
Resolution describes how much detail an image holds. On the web, what matters most is pixel dimensions (width x height).
A 4000px wide image uploaded at full size will slow your site down.
Resize images to match how they’ll display on your site (for example, 2500px wide for a hero banner).
DPI/PPI (dots or pixels per inch) matter for print, not for the web. Focus on pixel dimensions instead.
Image Compression: Lossy and Lossless
Compression reduces file size so images load faster:
Lossy compression (JPEG, WebP): Removes some data for smaller files. Slight quality loss but better for performance.
Lossless compression (PNG, TIFF): Keeps all original data. Larger files but higher quality.
Best practice: Keep an original high-quality version of your image and upload a compressed version for your site.
Image Metadata (EXIF)
Most images include hidden metadata, called EXIF, such as:
Camera type and settings
Date/time taken
Location (GPS)
Copyright info
While useful for photographers, EXIF can increase file size and raise privacy concerns.
Best practice: Remove unnecessary metadata before uploading to speed up your site and protect privacy. If location is important for SEO, selectively keep geotags.
Image File Formats FAQs
-
WebP is often the best choice—it keeps file sizes small without sacrificing quality. But JPEG, PNG, SVG, and GIF still have important roles depending on image usage.
-
Yes! In 2025, Squarespace launched WebP support. To optimize Squarespace sites’ performance, all images on Squarespace automatically display using the WebP format.
-
To choose the best image file format for your website, you must understand the different file types and their intended use.
PHOTOS: WebP or JPEG
LOGOS & ICONS: PNG or SVG
GRAPHICS WITH TRANSPARENCY: PNG or WebP
ANIMATION: GIF or WebP
-
Yes, GIFs can be large files. Use them sparingly.
-
Begin by selecting the appropriate file type, then resize it to the display size, compress it using an optimization tool, export it for web in RGB, rename the file for SEO, and add alt text for accessibility.
Conclusion
Choosing the right image file type improves both appearance and performance. Always optimize your images before uploading to your website.
If you found this post helpful or have any questions, let us know in the comments. Need help with your brand and website? Submit our contact form to get started.
Quick Guide to Logo File Formats
Download our free Quick Guide to Logo File Formats to know what file you need, where to use it, who uses it and why it’s right for the job.