The Ultimate Guide to Planning a Professional Brand Photoshoot

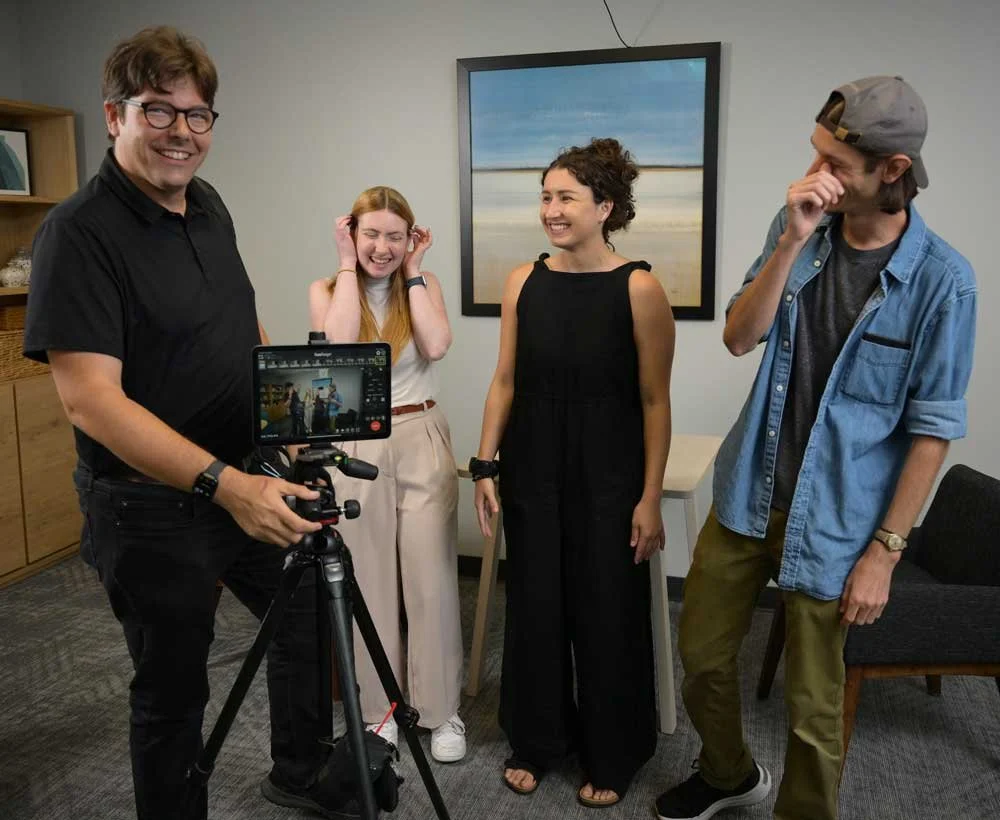
l-r: Sam Levitan, Vanessa Powers, Emily White and George Civita, take a celebratory selfie after a successful photoshoot.
Quick Links
Overview
Investing in a professional custom photoshoot for your business is an incredible opportunity that can enhance your online presence and establish trust and authenticity. The images can be used on your website, social media platforms, email campaigns, presentations, and print materials—truly everywhere! When done right, these images tell your story, showcase your values, and provide potential clients with a glimpse of who you are, even before they meet you.
However, a photoshoot involves more than just smiling in front of the camera. Careful planning is essential; otherwise, you might end up with photos that don’t quite capture the essence of your services. With the right preparation, you can create a library of images that reflect your business, personnel, and services.
If you're considering a custom photo shoot, we’re here to help! Our guide shares insights from our experience, including what to plan and expect, as well as how to ensure your big day is a success. We’ve included handy checklists for every step of the process, along with tips to stay calm and adaptable when surprises arise.
“It is more important to click with people than to click the shutter.”
Laying the Groundwork Before the Big Day
At Design Powers, we have experience directing brand photoshoots for small to mid-size businesses. We've seen that preparation can create an enjoyable and incredibly productive photoshoot experience. One of our most recent shoots was with Expand Psychology. With a team of 18 therapists, plus three child models and two adult models, capturing their services in one day would be a significant challenge. However, through careful planning and strategy, we turned that vision into a reality.
We began by researching the websites of other therapy practices similar in scope and size to determine the types of visuals they typically used. In almost every case, they used stock imagery. This makes total sense, too, because therapy is a private, highly personal endeavor. It’s unlikely that actual clients want to advertise that they are getting it... not that there is anything wrong with it, but you get my point.
Since it’s not usual for a therapy practice to have custom photos, we knew that Expand would stand out by opting for custom photography. It’s always good to reference businesses like yours to have a solid understanding of what is out there and where you can differentiate yourself.
Start With a Shot List
The first step in any photoshoot is determining what images you need. This is where the shot list comes in handy. A shot list is a doc that ensures you get the right image(s) for every web page that aligns with your services.
Some definite needs: The homepage requires a hero image, the team page needs consistent headshots, service pages should feature relevant therapy interactions, and the career page needs group shots that showcase collaboration and training. With up to 25 people to be photographed, a casual “let’s get some headshots” could easily devolve into chaos if not well-organized and scheduled.
What to Map Out:
Specific offices that are available and ideal
Props needed (if any)
Which therapist and model(s) would be necessary for each shot
General feeling/emotion that we wanted to capture
Schedule the Day Strategically
Once we determined the necessary shots, we created a realistic timeline. For this shoot, that meant scheduling 18 headshots in under two hours, blocking out time for child, teen, and adult therapy scenarios, and allowing for group sessions and posed shots of the staff interacting. All while giving the therapists time to change outfits, ensuring that the child models were in use during their allotted time, and allowing everyone time to eat lunch.
Did I mention that some people would be arriving late, while others had to leave early? There are always numerous variables to consider when managing a shoot with many people.
Making Your Schedule:
Allocate blocks for headshots, staged scenes, group shots, and breaks
If possible, try to allocate buffer time in case of unforeseen challenges
Share the schedule with all participants
Create a Photography Guide
For many people, being photographed can be intimidating. Even those who have had headshots taken before may not know what to expect from a full-day brand shoot involving outfit changes and staged scenarios. That’s why we always create a photo guide!
We also compile an iStock board with sample photos for clients to review, helping them understand the types of shots we aim to capture during the shoot. After they look through and provide feedback on the board, we include the selected examples in our photo guide. This way, even those with little experience have a handy reference for posing during the shoot.
For Expand Psychology, Our Guide Included:
Clothing suggestions: soft, solid, cool, coordinated colors (without being matchy-matchy)
Jewelry and hairstyling tips for a clean, professional look
Body language examples and pose inspiration
Additionally, we asked everyone to bring multiple outfits. In some scenes, therapists would be portraying themselves, while in others, they would need to pose as “patients.” For instance, when staging a family therapy session, one therapist played the role of the clinician, while another played the role of the mother. To avoid confusion when those same therapists appeared later in different scenes, we ensured they wore varied outfits and used different camera angles to distinguish them. Without the photo guide, transitions could have been stressful and awkward.

Scout Out the Space Beforehand
One of the most valuable steps in our process is conducting a thorough walkthrough of the location where we will be shooting. This serves multiple purposes: it helps us stay organized by identifying which offices are available and their proximity to each other.
If your shoot will take place in your office or workspace, conducting a walkthrough is essential. Photoshoots are as much about the environment as they are about the people, and elements like room size and decor/furniture placement can significantly affect the day! Also, gauging natural light and time of day can be used to the photographer's advantage if planned out.
Key Takeaways:
Two offices contained colorful toys ideal for children’s therapy scenes
Another space offered a couch setup perfect for family counseling
The spacious conference room was also well-suited for group sessions and training shots
Even if your shoot is in a studio, a walkthrough (or at least scouting locations) helps you plan logistics and anticipate challenges.
Things to Look Out for During Your Walkthrough:
Visit all areas you plan to photograph
Note lighting conditions and potential obstacles. Make a note of the window coverings (curtains, blinds, etc)
Identify ideal backdrops for each type of shot. Make a note of art on the walls-does it add or distract from a shot? If it distracts, plan to remove it from the wall the day of the shoot
If spaces are messy, discuss with your client to ensure areas, countertops, and desks are clutter-free. This includes shelves and bookcases as well. Streamlining puts the focus on the human subjects getting shot. Any objects, furniture or art should help tell the story. Clutter can make a business look unprofessional. If not, you will spend time removing unwanted objects from your photos, which is both time-consuming and costly.
Snap reference photos to refer to later, to include in your photo guide, and to give to the photographer if they can’t attend. We prefer the photographer to accompany us, but it’s not always feasible


l-r: Adam’s Office, Conference Room, Katie’s Office, and Kirimi’s Office
Prepare for a Curveball or Two
We had two challenges that we had to overcome for this shoot. Our first was that the practice only hired child models, not adult models. This meant that therapists had to take on the role of parents in some sessions.
To resolve this, we shot creatively: angling the camera to ensure “adult” faces weren't visible. At the same time, they posed as “patients,” swapping outfits between scenes, and carefully staging body language to avoid confusion. We were aware of this challenge going into the shoot, so we planned our shot list and schedule around it. Even the best preparation can't eliminate surprises, though.
Our other hiccup came when our original photographer had to withdraw due to a medical issue just two weeks before the shoot. One of the keys to organizing a successful photoshoot is staying calm in the face of adversity. Unexpected problems are bound to arise, and it’s crucial to rely on your network when you need a quick rec!
Fortunately, Evelyn knows several area photographers, so she reached out to Rebecca Drobis; however, since we were only two weeks out, she was unavailable on the scheduled day of the photoshoot. Since the client had already scheduled all the therapists, hired the models, and closed their office to patients, we knew that rescheduling the shoot would be problematic and might set us back several weeks. Fortunately, Rebecca referred us to a photographer who was available on July 25! Enter… Sam Levitan!
Hold a Pre-Photoshoot Meeting
Before the shoot, we like to meet with the photographer to review the shot list, photo guide, and overall vision. This helps them understand the story you’re telling and any logistical constraints that may be present.
Typically, we conduct this process during the walkthrough with the photographer present. This time, we used Zoom, mainly because we had to hire Sam on short notice—those photos of the spaces we took when scouting the location really came in handy! We also got to know Sam a little better during this meeting. He shared with us his experiences as the son of a psychologist and his years of shooting the Psychology Networker Symposium. We were thrilled—he was perfect for the assignment!
During Your Prep Meeting:
Review the shot list and photo guide with the photographer
Discuss locations, lighting, and props
Share reference images and inspiration
Confirm timing, schedule, and expectations
“Photography is 99% moving furniture”
What to Expect the Day of
Arrivals, Set-Up, and Last-Minute Styling
The shoot kicked off bright and early at Expand Psychology’s office. Sam and his assistant George Civita rolled in with carts of lighting and gear. Emily acted as our artistic director for the day, floating through each office and recommending styling tweaks and outfit changes for the therapists who were trickling in.
Even with a detailed shot list and walkthroughs, we were still moving furniture, swapping décor, and tweaking lighting up until the last minute. That’s the nature of a shoot: you can plan every detail, but the real magic happens in the adjustments!
Setting Up Includes:
Set up lighting, furniture, and props
Make last-minute styling tweaks
Confirm outfits and props are ready for each scene
Headshots on a Tight Timeline
By 9 a.m., the headshot marathon was underway: 18 clinicians, three poses each, all in two hours. To maintain consistency, we used the office of Katie O'Meara, founder of Expand, as our backdrop. Each therapist got about seven minutes (just enough time for three distinct looks).
Emily adjusts Adam’s posture
Sam kept the mood light by asking questions like, “Who’s your therapist hero?” or “Where are you from?” Emily made sure collars, shirts, hair, and posture were in good form. I kept track of time, ensuring that we stayed on schedule.
Even therapists who started a bit apprehensively relaxed into the process. It was fun watching professionals who were accustomed to working in privacy shine in the spotlight!
Quick Headshot Checklist:
Choose a consistent backdrop for headshots
Allow enough time for multiple poses per person
Use lighthearted questions and direction to encourage natural expression
Keep a close eye on the time to stay on schedule
Working With Models
If your shoot involves models (especially children), allow extra time for setup, direction, and breaks. For this shoot, we had three child models from the Kingsley Management: Stella (7), Matthew (12), and Alyssa (17). They arrived with their moms and multiple outfits in tow. Briefing parents on the day's schedule and outfits helps keep the children focused and with smoother transitional periods.
From there, we staged therapy and testing sessions designed to highlight different services. Stella giggled over pattern blocks and wooden dolls, while Matthew focused on puzzles and even squeezed in a game of Uno. Alyssa, on the other hand, engaged in deeper conversations with the clinicians.
Sam kept the atmosphere natural by chatting with them between takes, while Emily posed the therapists and children with just the right gestures.
When Working With Models:
Schedule extra time for child or adult models
Prepare props to keep models engaged during pictures (if necessary)
Use patience, humor, and flexibility to keep it light!


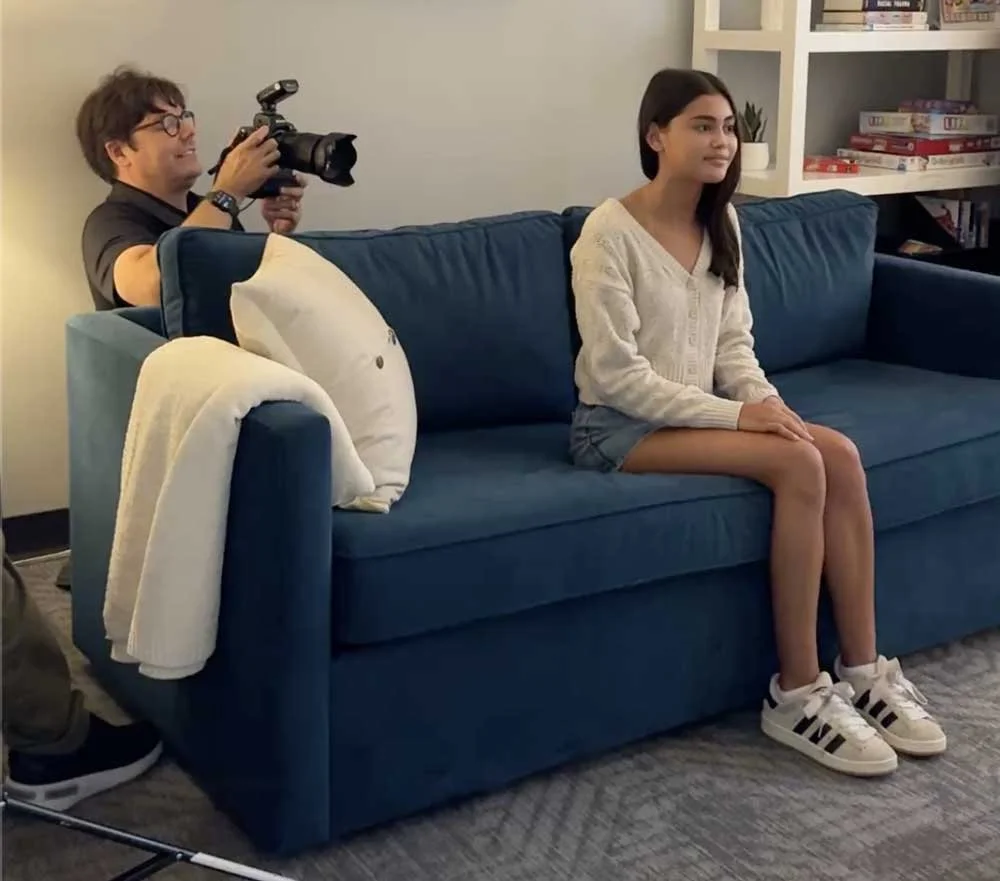
l-r: Sam takes photos of Matthew and Anu having an in-depth discussion, Stella races cars with Adam in view on the monitor, Alyssa sits patiently while Sam shoots over her shoulder behind the couch.
Staged Scenarios and Realism
Not every scene was straightforward. To recreate family therapy and divorce mediation sessions, adult “patients” were played by therapists or even family members of the staff. To avoid confusion, we leaned on clever angles, wardrobe changes, and body language.
One compelling shot came when Katie’s son Luke slipped on my engagement ring to play a husband in a tense family counseling session. Behind the camera, the room was full of laughter, even though the final photo captured just the right mix of conflict and empathy.
For the adult therapy scenes, these sessions required subtlety: a tissue handed across a table, a thoughtful head tilt, a therapist leaning forward in empathy.
Even here, the atmosphere stayed lighthearted. Adam Rosen, Clinical Director, cracked us all up with some mock wailing, but the photos captured the professionalism and intimacy of real therapy sessions.
Helpful Tips When Staging a Scene:
Wardrobe and camera angles to differentiate roles
Small gestures and props to make scenes believable
Encourage natural interaction and emotion
“Today, I am going to shoot someone… and they will love me for it!”
Energy Management Throughout the Day
Brand shoots can be exhausting. It’s essential to ensure that everyone has time to eat and rest, keeping spirits high. Our therapists and models had time to eat when they weren’t being photographed.
Unfortunately for us worker bees, there wasn’t much time for lunch if we wanted to stay on schedule. While Emily rearranged some objects to set up for the next several shots, Sam, George, and I took the opportunity to enjoy some delicious catered sandwiches. As the three of us got back into shooting, Emily grabbed a sandwich while art directing and giving the models instructions!
To Keep Up Energy & Logistics:
Have snacks, water, and quick meals ready
Rotate participants efficiently, giving the people who aren’t being used enough time to eat and use the bathroom
Keep energy high by staying positive!
Group Shots and Team Scenes

Later in the day, we gathered therapists for group therapy scenes, training sessions, and career coaching moments. These shots were designed to showcase collaboration and community. We also had to capture some Telehealth shots since Expand offers virtual appointments. We posed scenes of people leaning in at laptops, handshakes, and laughter around a conference table.
They were some of the most joyful moments to capture, because they weren’t far from reality. This team truly enjoys working together, and it shows in the photos.
Tips for Good Group Shots:
Schedule group scenes early if participants need to leave
Position participants to showcase relationships and teamwork
Capture multiple angles for flexibility in editing
Wrap Up After the Photoshoot
1. Quick Review
Before you head out for the day, double-check the library and make sure that you’ve captured all the must-have shots!
2. Thank Your Team
A heartfelt thank you goes a long way! It's especially meaningful after a busy day of wardrobe changes, posing, and creative moments.
3. Share Sneak Peeks
Posting behind-the-scenes glimpses can create buzz for your launch and truly connect with your audience! BUT make sure you check with your client before sharing any images on social media.
The Payoff
By the end of the day, you'll walk away with much more than beautiful photos! You'll create a vibrant library of images that showcase your professionalism and your business’s unique story. With thoughtful planning, flexibility, and collaboration, you can transform a hectic day into a productive one!
Joy and relief from a long day of shooting. Check out Expand Psychology’s website to see all the fabulous shots!
Brand Photography Shoot FAQs
-
It depends on the shoot, but we recommend starting to schedule at least two months in advance.
You want to give yourself time to finalize concepts, book a photographer, secure locations, and organize logistics.
Starting early also gives some flexibility to accommodate any unforeseen changes. If you're aiming for a specific launch date, be sure to factor that in as well.
-
The choice between hiring a professional photographer or doing it yourself depends on your goals and budget.
Professional photographers bring expertise in lighting, composition, and retouching. We love using them, and are always much happier with a website when they have good pics!
However, if you're on a tight budget, you could take the photos yourself or hire someone less experienced. Be aware that image quality can affect how people perceive your business, though.
-
We recommend not going over 8 hours! Even that is a long day, so make sure you’re scheduling out plenty of break time for your team.
-
It's usually best to schedule group shots first to capture everyone fresh and engaged. This prevents people from wandering off or getting distracted as the day goes on.
But if you have other shots that take priority, you might choose to do them last. It really depends on what you have to capture throughout the day (and who’s staying vs leaving)!
-
Don’t panic! These things happen.
1. Communicate Promptly: Inform everyone affected right away.2. Provide Alternatives: Offer rescheduling options if it’s a problem with the date. If it’s your photographer cancelling, ask them for referrals to find a suitable replacement.
3. Process Refunds: If the job is not going to continue (and the reasons for cancellation are acceptable), issue refunds.
4. Document Everything: Keep records of all communication.